The secret to booking the Glacier Express isn’t finding a ‘discount’—it’s mastering the hidden variables to get a first-class experience for a standard-class price.
- The side of the carriage you book determines whether you see the journey’s iconic highlights or stare at a rock face.
- ‘Premium’ upgrades are often a trap; Second Class offers identical views, and there is no ‘open-air observation car’ as many believe.
Recommendation: Stop hunting for elusive fare reductions and instead focus on strategic seat selection, route timing, and using local trains on the same tracks for key segments to achieve true value.
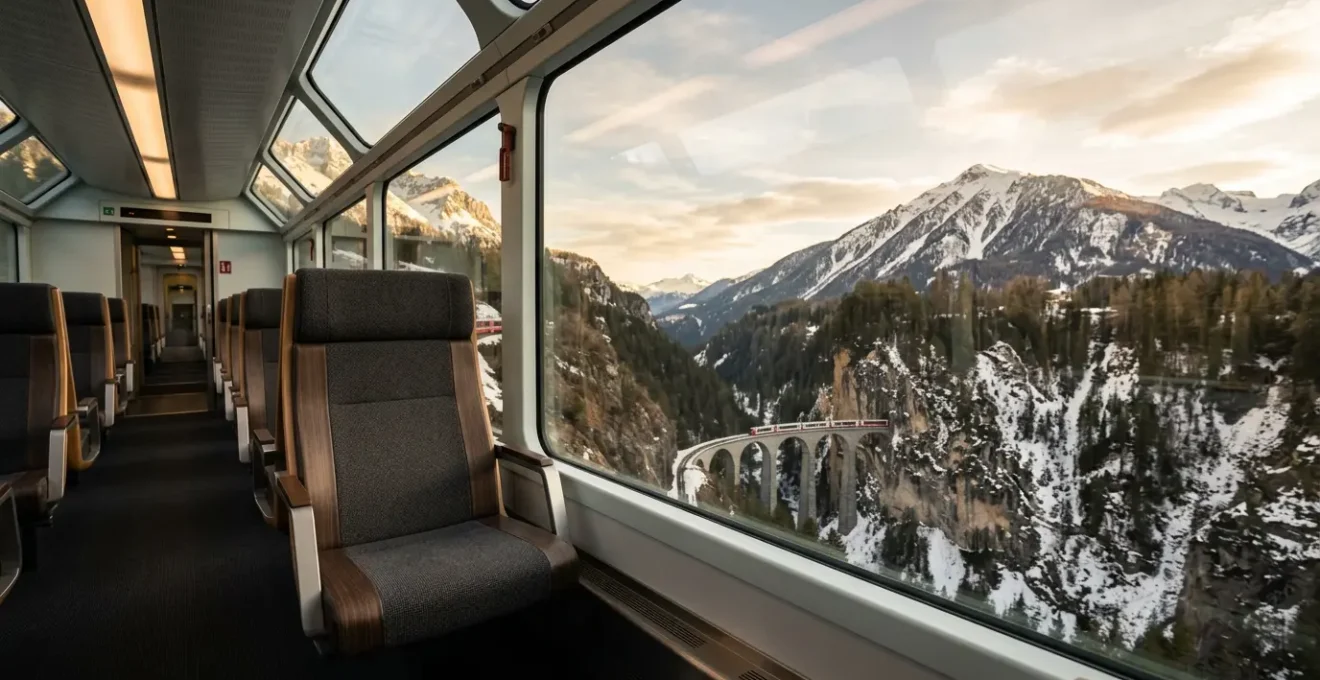
The dream is simple: gliding through the Swiss Alps in a glass-domed carriage, pristine peaks and storybook villages unfolding before you. The Glacier Express isn’t just a train ride; it’s a bucket-list journey. But the reality often hits with the force of a Swiss bank statement: eye-watering prices, confusing booking sites, and the nagging fear of being just another tourist caught in a premium-priced trap. The common advice you’ll hear is to “book in advance” or “travel off-season,” platitudes that barely scratch the surface of a system designed to maximise revenue from unsuspecting visitors.
But what if the entire approach is wrong? What if the key to unlocking the Glacier Express isn’t about chasing small discounts on the ticket price, but about mastering the art of experiential return on investment? This is the core philosophy of the seasoned rail fanatic: understanding that the true cost of a journey is measured in missed photo opportunities, neck-craning views, and unnecessary ‘comforts’. It’s about a strategic arbitrage where you ruthlessly cut spending on things that don’t matter to reinvest in what does: the view.
This guide will deconstruct the Glacier Express experience from the inside out. We’ll ignore the marketing fluff and focus on the hidden variables—from the precise seat that captures the Landwasser Viaduct to the photography hacks that defeat window glare. We will show you which upgrades are worth it and which are a waste of money. Then, we’ll zoom out, applying these same principles to master other iconic European rail journeys, turning you from a passive passenger into a savvy traveller who always gets the best seat in the house.
In this guide, we break down every strategic element to ensure your scenic rail journey is everything you hope for, without the hefty price tag. Discover the secrets that separate the novice traveller from the rail expert.
Contents: The Rail Fanatic’s Playbook
- Why Booking on the Wrong Side of the Carriage Ruins the Entire Experience?
- How to Eliminate Glare When Photographing Through Double-Glazed Windows?
- First Class vs Second Class: Which Offers Better Photography Angles?
- The Route-Planning Mistake That Puts You in Tunnels During the Best Peaks
- When Is the Exact Moment to Queue for the Open-Air Observation Car?
- First Class vs Standard Eurostar: Is the £80 Upgrade Worth It?
- Autoroute vs Route Départementale: Which Suits a 14-Day Slow Travel Itinerary?
- Mastering European Express Trains: Swapping EasyJet for High-Speed Rail Comfort
Why Booking on the Wrong Side of the Carriage Ruins the Entire Experience?
This is the single most important decision you will make, and it costs nothing. On a journey famed for its views, choosing the wrong seat is the difference between eight hours of Alpine wonder and eight hours staring at a rock face. The train route is not a symmetrical experience; the premiere sights are overwhelmingly stacked on one side. For the classic eastbound journey from Zermatt to St. Moritz, the money is on the right-hand side. It is not a slight preference; it’s a near-total victory.
Analysis of the route shows that this is no exaggeration. From the initial views down the Mattertal Valley to the iconic approach to the Landwasser Viaduct, the most dramatic and photogenic moments are framed by the windows on the right. In fact, according to documented journey analysis, as much as 85% of the key scenic highlights are best viewed from this side when travelling east. The left side gets its moment of glory through the Rhine Gorge, but it’s a short-lived victory in a day-long battle for views. For westbound travellers (St. Moritz to Zermatt), the logic is simply reversed: book the left side.
However, there’s a crucial “hidden variable” that even savvy travellers miss: the train reverses direction at the Chur station. This means your coveted right-hand seat suddenly becomes a left-hand seat for the final leg of the journey. For groups, the ultimate strategy is to book window seats on both sides of the carriage, creating your own panoramic bubble. This simple act of foresight guarantees you’re always on the winning side.
Your Action Plan: Strategic Seat Selection by Direction
- For eastbound travel (Zermatt to St. Moritz), book seats on the right-hand side for the best views of the Mattertal Valley and the Landwasser Viaduct approach.
- Regardless of direction, expect the main Rhine Gorge scenery to be on the left side of the train (eastbound) or right side (westbound).
- Be aware of the direction change at Chur. After this stop, your right-side seat will become a left-side seat, and vice-versa.
- If travelling as a group of four, reserve a table with two window seats on each side to guarantee optimal viewing for everyone throughout the journey.
- When booking as a couple, select two face-to-face window seats. This is far superior to sitting side-by-side, as it prevents one person from being boxed in.
How to Eliminate Glare When Photographing Through Double-Glazed Windows?
You’ve secured the perfect seat. The Alpine panorama is breathtaking. You raise your camera, and the shot is ruined by a reflection of your own face and the fluorescent light strip above you. The panoramic windows of the Glacier Express are fantastic for viewing but are a nightmare for photography. The double-glazing creates a funhouse of reflections. However, defeating glare is a solvable problem, and it doesn’t require expensive gear.
The most effective technique is brutally simple: create a physical seal between your lens and the glass. A professional travel photographer documented his success by using a universal silicon lens hood. As detailed in a case study on eliminating train window glare, pressing the flexible hood flat against the window creates a light-tight barrier, completely removing the reflections that plague most amateur shots. This single, inexpensive accessory does more to improve your photos than any complex filter.
If you don’t have a dedicated hood, a dark jacket or cloth can serve the same purpose. Drape it over your camera and yourself, creating a dark ‘tent’ against the window. It looks ridiculous, but it works. A polarizing filter can also help but is less reliable as its effectiveness depends on the angle of the sun. The key is to combine these physical methods with a crucial camera setting: manual focus set to infinity. This prevents your camera’s autofocus from getting confused by smudges or dirt on the glass, ensuring your focus is locked on the distant peaks, not the window itself.
This table breaks down the most common methods for fighting reflections, showing why a simple piece of rubber or your own jacket often outperforms expensive filters.
| Method | Effectiveness | Cost | Practicality on Trains |
|---|---|---|---|
| Rubber Lens Hood | Highly effective for vehicle windows | $15-30 | Excellent – easy to carry |
| Polarizing Filter | Variable – depends on light angle | $50-150 | Good but needs one per lens |
| Black Cloth/Jacket | Very effective when sealed properly | Free | Excellent – always available |
| Manual Focus at Infinity | Prevents focus on glass smudges | Free | Essential complement to physical methods |
First Class vs Second Class: Which Offers Better Photography Angles?
The automatic assumption is that First Class on the Glacier Express must be better in every way. It’s more expensive, so the views must be superior, right? Wrong. This is one of the most common and costly misconceptions. The windows in First and Second Class are identical. The route is identical. The scenery is identical. You are not paying for a better view; you are paying for space and service. For the savvy traveller, especially the photographer, this distinction is crucial.
The primary difference is the seating configuration. Second Class has a 2+2 arrangement (two seats on each side of the aisle), while First Class offers a more spacious 2+1 layout. For a solo traveller or a couple, this is the entire value proposition of the upgrade. As one case study noted, a pair of travel photographers found the upgrade to First Class worthwhile specifically because the 2+1 layout guaranteed them both a window and an aisle seat, allowing for unobstructed movement and angles without disturbing other passengers. They had their own ‘zone’ to operate in. However, they stressed that the views themselves were no different from the seats in the carriage behind them.
From a pure value-for-money perspective, Second Class is the clear winner. You get the same billion-dollar panorama for a significantly lower price. A cost analysis shows that second class provides an identical scenic experience with an average of 43% cost savings. The decision to upgrade should not be based on a false promise of better views, but on a clear-eyed assessment of your need for personal space. If you’re a photographer who needs room to manoeuvre or a couple wanting more privacy, the extra cost might be justified. For everyone else, save your money and book Second Class.
The Route-Planning Mistake That Puts You in Tunnels During the Best Peaks
You’ve picked the right side of the train and the right class for your budget. But there’s another hidden variable that can sabotage your experience: timing. The Glacier Express journey is long, and the quality of light changes dramatically throughout the day. The most common route-planning mistake is failing to align the best scenery with the best daylight, especially during the shorter days of winter. It’s heartbreaking to enter a long tunnel just as the ‘golden hour’ begins to paint the peaks in glorious light.
The journey’s crowning moment, in terms of altitude and raw mountain drama, is the Oberalp Pass. Here, the train reaches its summit at 2,033 meters, crossing the desolate, beautiful landscape of the Alpine divide. Being here in flat, midday light is one thing; being here as the sun sets is another entirely. In winter, if you start your journey too late from Zermatt, you risk crossing the pass in twilight or even darkness. The savvy traveller plans backwards from the light. A great tip for winter travel is to start in St. Moritz and travel westbound; this keeps the low winter sun largely behind you for the critical Oberalp Pass section, providing better front-lighting for your photos.
Summer journeys (June-September) offer the longest daylight hours, making timing less critical but still important. Even on a long summer day, morning fog can obscure views in the valleys, while afternoon thunderstorms can build over the peaks. The ultimate strategy for photographers is to break the journey. Instead of doing the full eight-hour trip in one go, consider an overnight stop in a town like Andermatt (near the Oberalp Pass) or Chur. This allows you to experience the most spectacular sections of the route in the perfect morning or evening light, transforming a long travel day into two perfectly timed scenic excursions.
When Is the Exact Moment to Queue for the Open-Air Observation Car?
Here’s one of the biggest insider secrets of the Glacier Express: there is no open-air observation car. This is a persistent myth, a phantom carriage that hopeful tourists search for in vain. You can spend the entire journey waiting for an announcement that will never come. The train is made up of sealed, air-conditioned panoramic cars. So, does that mean you are trapped behind glass for eight hours? No. You just have to know where to find the secret ‘windows’.
The definitive myth-busting comes from rail travel experts who have documented the train’s real features. As confirmed by an in-depth guide from Seat61.com, the true photo opportunities lie not in a dedicated car, but in the train’s functional spaces. The key is the droplight windows in the entrance doors at the end of each carriage. By pinching two small knobs at the top, these windows can be lowered, providing a perfectly clear, reflection-free opening for your camera lens. This is where the iconic, sweeping shots of the train curving over viaducts are taken.
Additionally, the bar car has large windows that pull down completely. This area naturally becomes an informal gathering spot for photographers, especially in the minutes leading up to a major sight like the Landwasser Viaduct. The “exact moment to queue” is therefore about 5-10 minutes before a key landmark appears on your route map. This gives you time to get to the end of a carriage or the bar car and secure your spot at one of these precious few open windows. For those who absolutely must have a true open-air experience, the answer is to use the regular, hourly regional trains that run on the exact same tracks. They lack the panoramic domes but feature opening windows and cost a fraction of the price, allowing you to hop on and off at will.
Case Study: The Myth of the Open-Air Car
Travel experts confirm the Glacier Express has no open-air observation car, a common misconception. However, photographers discovered that the droplight windows in the entrance doors can be opened by pinching two small knobs. Furthermore, the bar car has large windows that pull down completely. These two locations have become the de facto spots where passengers gather for key photo opportunities like the Landwasser Viaduct, providing the clear, open-air shots many travellers seek.
Key Takeaways
- Seat selection is paramount: Book the right-hand side for eastbound (Zermatt-St. Moritz) journeys to see the best views.
- Defeat window glare by pressing a rubber lens hood or a dark jacket against the glass to create a light-tight seal.
- Second Class offers identical panoramic views to First Class for a significantly lower price; you only pay extra for more space.
- There is no open-air observation car. For clear photos, use the droplight windows in the carriage doors or the pull-down windows in the bar car.
- For the ultimate value, consider using cheaper regional trains on the same scenic tracks, which offer opening windows and hop-on-hop-off flexibility.
First Class vs Standard Eurostar: Is the £80 Upgrade Worth It?
The principles of value arbitrage we’ve applied to the Glacier Express are universal. Let’s apply them to a journey familiar to every UK traveller: the Eurostar. The question is always the same: is the upgrade to Standard Premier or Business Premier worth the hefty price jump? Unlike the Glacier Express, the “view” isn’t the product, so the calculation changes. Here, the return on investment is measured in comfort, time, and convenience.
An £80 upgrade from Standard to Standard Premier gets you a larger seat in a 2+1 configuration (instead of 2+2) and a light meal served at your seat. Is that a good deal? It depends entirely on the context of your trip. The tangible value of the meal is perhaps £25-£35, and the extra space is a subjective comfort. For a short journey to Paris, many would argue it’s an unnecessary luxury. The real value is often psychological—the feeling of starting a holiday with a touch of class.
As one rail expert noted in a European rail journey analysis, the upgrade’s worth is situational. It provides the highest value on an early morning business trip, where the included breakfast and quieter carriage allow you to work. It’s also valuable on a Friday evening trip, where the included dinner and wine kick-start a weekend away. Its value is lowest on a mid-afternoon off-peak journey where the train is half-empty anyway.
The upgrade’s worth is not static. It’s highest on an early morning business trip (breakfast + workspace) or a Friday evening ‘start of vacation’ trip (dinner + drinks), and lowest on a mid-afternoon off-peak journey.
– Rail Travel Expert, European Rail Journey Analysis
Autoroute vs Route Départementale: Which Suits a 14-Day Slow Travel Itinerary?
Let’s take our rail fanatic mindset and apply a classic slow-travel metaphor: the French Autoroute versus the scenic Route Départementale. The Autoroute is fast, efficient, and boring. The Route Départementale is slower, winding, but full of discovery. In Swiss rail, the Glacier Express is the famous Autoroute—a premium, direct, all-in-one package. But the country is crisscrossed by a network of stunning ‘Route Départementale’ railway lines that offer comparable, if not superior, experiences for a fraction of the cost and zero of the hype.
The perfect example is the Lötschberg Mountain Line. This is the old main line from Bern to Brig, running over the mountains, while most fast trains now use the new, deep-level Base Tunnel. Choosing the mountain route takes about 30 minutes longer but delivers a spectacular journey of high bridges, spiral tunnels, and dramatic valley views that rival many sections of the Glacier Express. It’s a regular, hourly service used by locals. There are no mandatory reservations, no tourist markups, and you can hop off at a village like Kandersteg to hike to the stunning Lake Oeschinen.
This is the essence of the “hybrid fast-slow” strategy. A savvy 14-day Swiss rail itinerary doesn’t involve slogging along on slow trains for the entire two weeks. It involves using the fast InterCity trains (the Autoroutes) to cover the uninteresting flatlands between major hubs like Zurich, Geneva, and Bern quickly and efficiently. Then, you strategically switch to the scenic lines (the Routes Départementales) like the Lötschberg Line, or segments of the Golden Pass or Bernina Express routes, for the truly spectacular bits. This approach maximises your time and your ‘Experiential ROI’, ensuring you’re only paying a premium (in time, if not money) for premium views.
Case Study: The Lötschberg Line – The Hidden Alternative
The Bern-Brig Lötschberg Line provides a dramatic mountain crossing with views comparable to the premium scenic trains, but without the tourist markup. The journey over the historic mountain route takes just 1h 40m, offering panoramic vistas and stopover options at charming towns like Kandersteg, a gateway to the famous Lake Oeschinen. This stands in contrast to the faster route through the base tunnel, which bypasses all the scenery.
Mastering European Express Trains: Swapping EasyJet for High-Speed Rail Comfort
Once you adopt the rail fanatic’s mindset, you start seeing the entire European travel map differently. The choice is no longer just “which budget flight is cheapest?”. The question becomes “what is the *true* total cost?”. When you factor in luggage fees, expensive airport transfers, and the stressful requirement to be at the airport two hours early, the cheap flight often becomes a false economy. High-speed rail offers a compelling alternative: city centre to city centre, generous luggage allowance, and a level of comfort that budget airlines can’t touch.
However, even here, there are hidden costs. A common trap for UK travellers in Switzerland is the Swiss Travel Pass. It seems to offer unlimited travel, but for premium panoramic trains like the Glacier Express, it’s not the whole story. As a comprehensive guide points out, even with a Swiss Travel Pass, travellers must pay a mandatory seat reservation fee of between CHF 24-49, depending on the season. This “hidden” fee can come as a nasty surprise. The real value of the pass comes from using it on the flexible, reservation-free regional and InterCity network—the very ‘Routes Départementales’ we discussed.
Ultimately, mastering European rail is about a holistic comparison. It’s about looking at the total journey, not just the headline fare. A £50 flight from London to Geneva is never just £50. As the table below shows, when you add up the extras, the price difference between flying and taking the train can narrow significantly, especially once you assign a value to your own time and comfort.
This table illustrates the true cost comparison between a budget flight and a premium train journey like the Glacier Express, factoring in all the hidden extras.
| Cost Factor | EasyJet | Glacier Express |
|---|---|---|
| Base Fare | £39-89 | CHF 152-291 |
| Luggage (23kg) | £40-60 | Free |
| Airport Transfers | £30-50 | £0 (city center) |
| Time Buffer Required | 2 hours early | 20 minutes |
| Comfort Value | Cramped seats | Panoramic experience |
| True Total Cost | £109-199+ | CHF 152-291 |
By applying this strategic mindset, you transform from a mere tourist into a master of the rails. Your next European adventure won’t just be a trip; it will be a perfectly executed operation in travel efficiency and enjoyment. Start planning your next rail journey today with these principles in mind.