The success of a high-adrenaline Highlands trip hinges not on the number of activities ticked off, but on superior logistics and energy management.
- Treat your group like an athletic team, focusing on muscular sequencing and planned recovery to maintain peak performance.
- Swap a frantic ‘point-to-point’ itinerary for a ‘hub-and-spoke’ model from 2-3 basecamps to eliminate logistical drag and increase flexibility.
Recommendation: Ditch the tourist mindset. Adopt a logistical framework that prioritises activity performance and recovery over covering maximum distance.
The vision is always epic: your group of friends, scaling a Munro against a dramatic sky, sea kayaking in a remote loch, and sharing stories by a crackling fire. The reality, for many, is a 14-day road trip that ends in silent, exhausted drives, nursing strained muscles and a profound sense of burnout. The classic ‘action-packed’ holiday often fails because it’s planned like a tourist itinerary, not an athletic expedition. The common advice to “see as much as possible” or “just drive the NC500” is a direct route to fatigue and underperformance when high-intensity sports are involved.
Most itineraries cram activities together based on geography, ignoring the physiological toll. They prioritise seeing sights over genuine recovery, leading to a trip that feels more like a gruelling commute. This guide rejects that flawed model. What if the key to the ultimate Highlands adventure wasn’t about managing your time, but about strategically managing your group’s physical and mental energy? What if you planned it not as a tourist, but as a logistics manager for a professional sports team?
This is a blueprint for exactly that. We will deconstruct the conventional road trip and rebuild it from the ground up, focusing on the principles that ensure you return home energised and accomplished, not broken. We will cover muscular sequencing to prevent injury, advanced risk mitigation for high-stakes activities, intelligent recovery protocols, and logistical strategies that maximise your time on the mountainside, not the motorway. This is your operational plan for peak performance in the world’s greatest adventure playground.
Summary: A Logistics-Driven Plan for a 14-Day Highlands Expedition
- Why Cramming Two Extreme Sports Into One Day Leads to Injury?
- How to Secure High-Risk Activity Insurance for Canyoning and Rafting?
- Wild Camping vs Bothies: Where Should You Recover After Hiking?
- The Weather Forecasting Error That Traps Hikers on the Cairngorms
- In What Order Should You Schedule Muscle-Intensive Activities?
- Why Changing Hostels Every 3 Days Destroys Your Mental Wellbeing?
- The W Trek or the O Circuit: Which Fits a 10-Day Itinerary?
- Building Custom Itineraries: Planning a 3-Week Japan Trip Without a £500 Agency Fee
Why Cramming Two Extreme Sports Into One Day Leads to Injury?
The biggest strategic error in planning an active trip is thinking in terms of time, not physiology. A morning of mountain biking in Aviemore followed by an afternoon of climbing seems efficient on paper, but it’s a direct route to injury. This isn’t about fitness; it’s about biomechanics. Many outdoor sports, while seemingly different, create intense strain on the same small, specialised muscle groups and connective tissues. Stacking them creates a cumulative load that leads to failure.
Consider the intense demand on grip strength, forearms, and shoulders. Rock climbing, kayaking, and even aggressive downhill mountain biking all heavily tax this same system. Attempting them back-to-back doesn’t allow for the necessary micro-recovery, dramatically increasing the risk of overuse injuries like tendonitis or, worse, a trip-ending tear. A study on rock climbers highlights this, noting that high forces transmitted to the fingers are responsible for the most common complaints, including flexor tendon pulley ruptures, which are highly specific to the sport.
As the image illustrates, the hands and fingers act as the primary interface for many extreme sports. Once this system is fatigued, performance drops, and the risk of a slip or fall skyrockets. An effective itinerary doesn’t stack activities; it sequences them intelligently. The core principle is muscular conflict avoidance: planning consecutive days to target different primary muscle groups, allowing for active recovery of one system while another works. This isn’t just about avoiding injury; it’s about ensuring you can perform at your best every single day.
How to Secure High-Risk Activity Insurance for Canyoning and Rafting?
Assuming your standard travel insurance will cover you for a Grade 4 white-water rafting trip or a day of gorge scrambling is a critical, and common, mistake. Most policies contain specific exclusions for activities deemed ‘high-risk’, and the onus is on you to prove you are covered, often at the worst possible moment. Securing the correct insurance is a non-negotiable part of your pre-trip logistics, a key pillar in your risk mitigation framework. It is not an add-on; it is as essential as your waterproofs.
The primary point of confusion lies between the public liability insurance held by an activity provider and a comprehensive personal adventure sports policy. The provider’s insurance covers their negligence, not your personal accidents. If you slip and injure yourself through no fault of the guide, their policy will not cover your medical evacuation or repatriation. This is where a specialist policy becomes invaluable. A clear breakdown of coverage is essential for understanding what you’re paying for. A comparison from Mountaineering Scotland highlights the gaps in relying on provider insurance.
| Coverage Type | Provider Liability Insurance | Personal Adventure Policy |
|---|---|---|
| Personal Accidents | Not Covered | Covered |
| Medical Evacuation | Limited | Full Coverage |
| Mountain Rescue | Not Included | Optional Add-on |
| Equipment Damage | Provider Equipment Only | Personal Equipment Covered |
| Trip Cancellation | Not Covered | Usually Included |
Navigating this requires a systematic approach. You need to actively seek out insurers who understand the specific risks of the activities you plan to undertake. Companies like the British Mountaineering Council (BMC) or Snowcard offer annual policies that are often more cost-effective and comprehensive than single-trip top-ups from generic insurers. Verifying the details is paramount: does the policy cover the specific grade of river you’ll be on? Does it include helicopter evacuation? Does it require you to be with a certified guide?
Wild Camping vs Bothies: Where Should You Recover After Hiking?
After a gruelling day on the hill, the question of where to recover is a strategic one. The choice between a remote wild camp and the spartan shelter of a mountain bothy isn’t just about comfort; it’s about the quality of your physical and mental recuperation. Both have distinct advantages and should be deployed as different tools in your recovery protocol, rather than being seen as interchangeable options. Your decision should be dictated by the day’s exertion and the plan for tomorrow.
A bothy offers guaranteed shelter from the notorious Scottish elements. This is its primary strategic value. After a day spent battling horizontal rain and gale-force winds, the ability to get dry, warm, and cook a meal indoors can be a huge morale booster and kickstart the recovery process. However, they can be crowded, noisy, and offer little privacy, which can hinder quality sleep. A key part of your planning is checking the Mountain Bothies Association website for locations and etiquette.
Wild camping, by contrast, offers solitude and a deeper connection to the landscape. This mental reset is a crucial, often overlooked, component of recovery. Crucially, it also offers a unique physiological advantage. As the experts at Mountaineering Scotland suggest:
Wild camping offers solitude and potential for cold-water dips in lochs, which can offer superior neuromuscular recovery compared to potentially crowded, noisy bothies.
– Scottish Outdoor Access Code, Mountaineering Scotland Guidelines
This is not a trivial point. Cold-water immersion is a proven technique used by professional athletes to reduce muscle soreness and inflammation. Choosing a campsite near a loch or a clear-running burn allows you to integrate this powerful recovery tool directly into your evening routine. A hybrid strategy is often most effective: use a bothy after the most draining, wettest days for guaranteed shelter, and opt for a wild camp on clearer nights to leverage solitude and cold-water therapy for superior neuromuscular recovery.
The Weather Forecasting Error That Traps Hikers on the Cairngorms
The most common and dangerous weather-related error hikers make in the Scottish Highlands is not failing to check a forecast, but relying on a single, generic one. A general BBC weather forecast for Aviemore is functionally useless for anyone heading onto the Cairngorm plateau. The vast, arctic-like plateau creates its own weather systems, a phenomenon known as a microclimate, where conditions can change from bright sunshine to a whiteout in under an hour. This is the trap: the weather in the glen gives a fatally optimistic impression of the conditions at 1,200 metres.
To operate safely, you must consult specialist mountain forecasts. The gold standard in the UK is the Mountain Weather Information Service (MWIS). Unlike generic forecasts, MWIS provides detailed predictions for specific upland areas, including vital information on wind speed at different altitudes, the freezing level, and the likelihood of cloud-free summits. It’s an essential tool for any serious mountain-goer. As a core part of your daily planning, you should be checking the MWIS forecasts, which cover 10 upland UK regions with daily updates.
However, even with the best forecast, the mountain holds the final say. The professional approach is to build a decision-making framework before you even leave the car park. This involves defining “bail-out” triggers based on the forecast and the reality on the ground. It’s not enough to “be flexible”; you must have a pre-defined plan for when to turn back. This is not a sign of failure but of expert judgment. For winter or spring trips, the Scottish Avalanche Information Service (SAIS) becomes equally critical, providing data on snowpack stability and avalanche risk.
Your Action Plan: Planning a Weather Escape Route
- Check both MWIS and Met Office mountain forecasts for your specific area to build a consensus picture.
- Note cloud base predictions and set trigger points (e.g., ‘If cloud drops below 900m by 11 am, we descend’).
- Identify wind acceleration zones, such as corries and narrow valleys, on your map and plan to be through them before the wind is forecast to peak.
- Plan a primary route (Plan A) and at least one shorter, safer bail-out route (Plan B) with clear decision points marked on your map.
- During winter conditions, check the SAIS (Scottish Avalanche Information Service) report for your intended route, paying close attention to aspect and elevation warnings for wind-slab.
In What Order Should You Schedule Muscle-Intensive Activities?
The secret to a successful 14-day high-intensity trip is muscular sequencing. As we’ve established, stacking activities that stress the same muscle groups is a recipe for injury and burnout. Therefore, the most critical piece of your logistical plan is a schedule that intelligently rotates the physiological load across the body. You must classify your intended activities not by location, but by their primary muscular impact.
A day of Munro hiking is predominantly a leg-intensive activity, focusing on quads, glutes, and calves. The following day should be an ‘active recovery’ day for the legs, meaning an activity that prioritises the upper body and core, such as sea kayaking. This allows your legs to repair and rebuild while you are still active. Driving on Scotland’s demanding single-track roads should also be considered an activity; it places a medium-intensity load on the core and nervous system through constant concentration and braking/accelerating. Following a long driving day with a full-body-intensive activity like coasteering is a poor strategic choice. This classification is your primary planning tool.
To help with this, you can categorise activities by their primary impact and required recovery time, a concept well-supported by various experienced travel planners.
| Activity Type | Primary Muscle Groups | Recovery Time Needed | Intensity Level |
|---|---|---|---|
| Munro Hiking | Legs (Quads, Glutes, Calves) | 48-72 hours | High |
| Mountain Biking | Legs + Core + Grip | 48 hours | High |
| Kayaking/Canyoning | Arms, Core, Back | 24-48 hours | Medium-High |
| Coasteering | Full Body | 72 hours | Very High |
| Driving Single-tracks | Core, Nervous System | 24 hours | Medium |
With this data, you can architect your fortnight. A well-structured plan follows a ‘progressive overload’ model, similar to an athlete’s training block. The case study for a successful trip involves starting with moderate activities for days 1-3 to acclimatise, building to a peak intensity block for days 4-10 where you tackle your main objectives (e.g., Ben Nevis, a major ridge traverse), and then tapering off with lighter, less demanding activities for the final days. This ensures you finish the trip feeling accomplished and strong, not depleted.
Why Changing Hostels Every 3 Days Destroys Your Mental Wellbeing?
One of the most insidious drains on a road trip is logistical drag: the cumulative mental and physical fatigue caused by the constant cycle of packing, unpacking, checking in, and checking out. An itinerary that has you changing accommodation every two or three nights might look efficient on a map, but on the ground, it’s a primary cause of burnout. It erodes your precious time and energy, converting adventure days into glorified moving days. You spend your evenings repacking gear instead of recovering, and your mornings are a frantic rush to meet a checkout time.
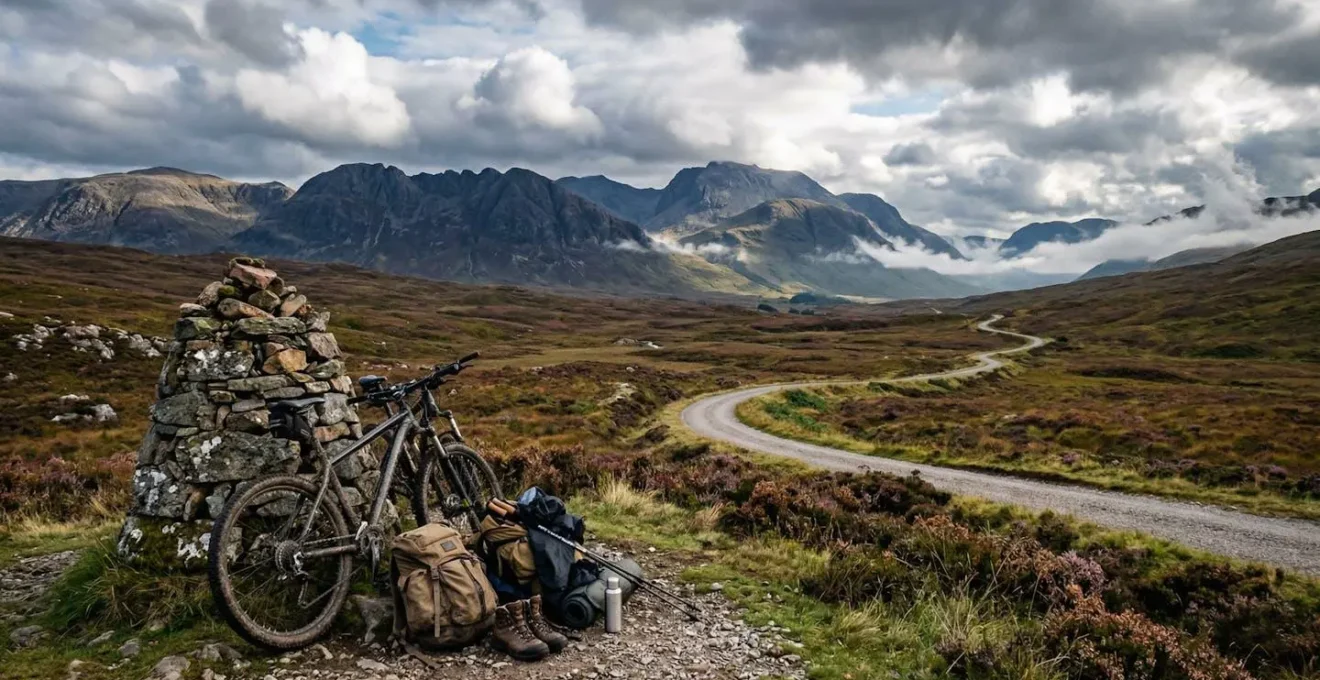
The solution is to abandon the linear, point-to-point model and adopt a ‘hub-and-spoke’ strategy. This involves establishing a small number of strategic base camps for longer durations (4-5 nights minimum) and using them to launch day trips. This approach dramatically reduces logistical drag and introduces a crucial element into your plan: flexibility. As one seasoned travel blogger wisely notes:
The ‘hub-and-spoke’ model using 2-3 strategic base camps like Fort William, Portree, and Aviemore reduces the logistical drag of daily packing and unpacking.
– Sue Where Why What Travel Blog, Scottish Highlands Itinerary Guide
For a 14-day Highlands trip, this means selecting a maximum of three base camps. For example: one near Glencoe/Fort William for the western mountains, one on Skye for the Cuillins and Trotternish ridge, and one in the Cairngorms National Park (e.g., Aviemore). From each base, you have a 60-90 minute driving radius of world-class activities. If the weather is poor in one direction, you can simply drive the other way. This model allows you to build in genuine rest days for laundry, life admin, and deep recovery, without feeling like you’re “falling behind schedule”. It’s about trading the illusion of “seeing everything” for the reality of high-quality, sustainable adventuring.
The W Trek or the O Circuit: Which Fits a 10-Day Itinerary?
While this question references famous treks in Patagonia, the underlying strategic dilemma is directly applicable to planning a major Scottish road trip: should you commit to a famous, pre-defined circuit, or build a flexible, linear route? For many, the default is to tackle the North Coast 500 (NC500), Scotland’s answer to a grand touring circuit. However, for a 14-day trip focused on extreme sports, this is often a logistical trap.
The NC500 is a route designed for driving and sightseeing. As a case study analysis shows, the circuit itself requires a minimum of 5-7 days just for driving, which eats significantly into the time available for activities. For an athlete, this is inefficient. A far more effective approach is a linear A-to-B route that connects key activity hubs. For example, a route from Glasgow to the Isle of Skye via the activity centres of Glencoe and Fort William. This focuses your driving time into 3-4 days total, leaving a full 10-11 days purely for your sports, recovery, and weather flexibility.
To build this linear route effectively, you need a way to quantify the effort of your intended itinerary. This is where you move beyond simple time-and-distance calculations and start thinking like a logistics manager. You can assign ‘Effort Units’ to each activity, allowing you to build a trip that has a manageable physiological load. An ascent of Ben Nevis is not just an “8-hour day”; it’s a 9-unit effort requiring 2-3 days of recovery.
| Activity Type | Effort Units (1-10) | Equivalent to | Recovery Days Needed |
|---|---|---|---|
| W Trek Day Equivalent | 8 | 6-8 hours hiking, 1000m elevation | 2 |
| Ben Nevis Ascent | 9 | 8-10 hours, 1344m elevation | 2-3 |
| Glencoe Ridge Hike | 7 | 5-6 hours, 800m elevation | 1-2 |
| Fort William Downhill MTB | 6 | 3-4 hours intense cycling | 1 |
| Aviemore Canyoning | 7 | 4-5 hours full body | 2 |
Using this metric system, you can ensure your 14-day plan doesn’t exceed a sustainable total effort score. You can balance high-effort days with lower-effort ones, building in recovery and ensuring you don’t ‘red-line’ your group mid-trip. This analytical approach replaces guesswork with a robust planning framework, turning your itinerary into a calculated plan for success.
Key Takeaways
- Sequence activities by primary muscle group to avoid overuse injuries and allow for active recovery.
- Adopt a ‘hub-and-spoke’ accommodation model from 2-3 basecamps to eliminate logistical drag and maximise flexibility.
- Build a weather escape plan before you leave; don’t just ‘be flexible’. Define your turn-back triggers based on specialist mountain forecasts.
Building Custom Itineraries: Planning a 3-Week Japan Trip Without a £500 Agency Fee
While the context of this title is international, the core principle is about empowerment: taking control of your own logistics to create a superior trip and save money. You do not need to pay a travel agency a £500 fee to plan your Scottish Highlands expedition. In fact, by doing it yourself, you not only save money but can also build a trip that is safer, more flexible, and better tailored to your specific objectives.
The information required to plan an elite-level trip is freely available if you know where to look. You simply need the right toolkit. Booking activities directly with local outfitters is often cheaper than going through a third party. Websites like Walkhighlands offer an incredible, free repository of routes complete with OS maps and GPX files. The MBA website lists every mountain bothy. By using these primary sources, you are operating with better, more current information than a generic travel agent.
Here is a foundational £0 agency fee toolkit for planning your Highlands trip:
- MWIS (Mountain Weather Information Service): Your primary source for detailed, three-day mountain weather forecasts. Non-negotiable.
- Walkhighlands: A comprehensive database of over 2,000 walking and hiking routes with free OS maps, user reports, and safety information.
- UK Climbing Logbooks: Provides real-time conditions reports from other climbers and mountaineers, invaluable for assessing route conditions.
- Local Outfitter Websites: Browse and book directly with companies in Fort William, Aviemore, or Skye for activities like canyoning and rafting to get the best prices.
- Mountain Bothies Association (MBA): The official source for locations, status, and etiquette for using the free mountain shelter network.
- SAIS (Scottish Avalanche Information Service): Essential app and website for daily avalanche hazard reports in winter.
The most compelling reason to plan independently is what you can do with the money you save. The £500 typically charged by an agency for a basic itinerary can be reinvested into elements that directly enhance your experience and safety. A case study on this approach shows that the savings could be redirected to hire a private mountain guide for a challenging day on the Cuillin Ridge (£350), purchase a premium annual adventure sports insurance policy (£89), or invest in vital safety gear like a GPS beacon (£250). These are tangible upgrades that an agency fee simply cannot provide.
Your mission, should you choose to accept it, is to use this logistical framework to build your own definitive Highlands expedition. Take these tools, assemble your team, and execute a plan that prioritises performance, safety, and recovery. The mountains are waiting.