Driving a 6-metre campervan in New Zealand is not a holiday drive; it’s a heavy vehicle operation where tourist assumptions lead to financial and physical disaster.
- Google Maps is dangerously inaccurate for large vehicles; its time estimates must be increased by at least 30% on all mountain routes.
- Standard braking on steep descents like the Crown Range will cause total brake failure; engine braking is not optional, it’s a critical survival technique.
Recommendation: Treat your rental agreement and the physics of your vehicle with the seriousness of a professional driver to avoid catastrophic mechanical and financial outcomes.
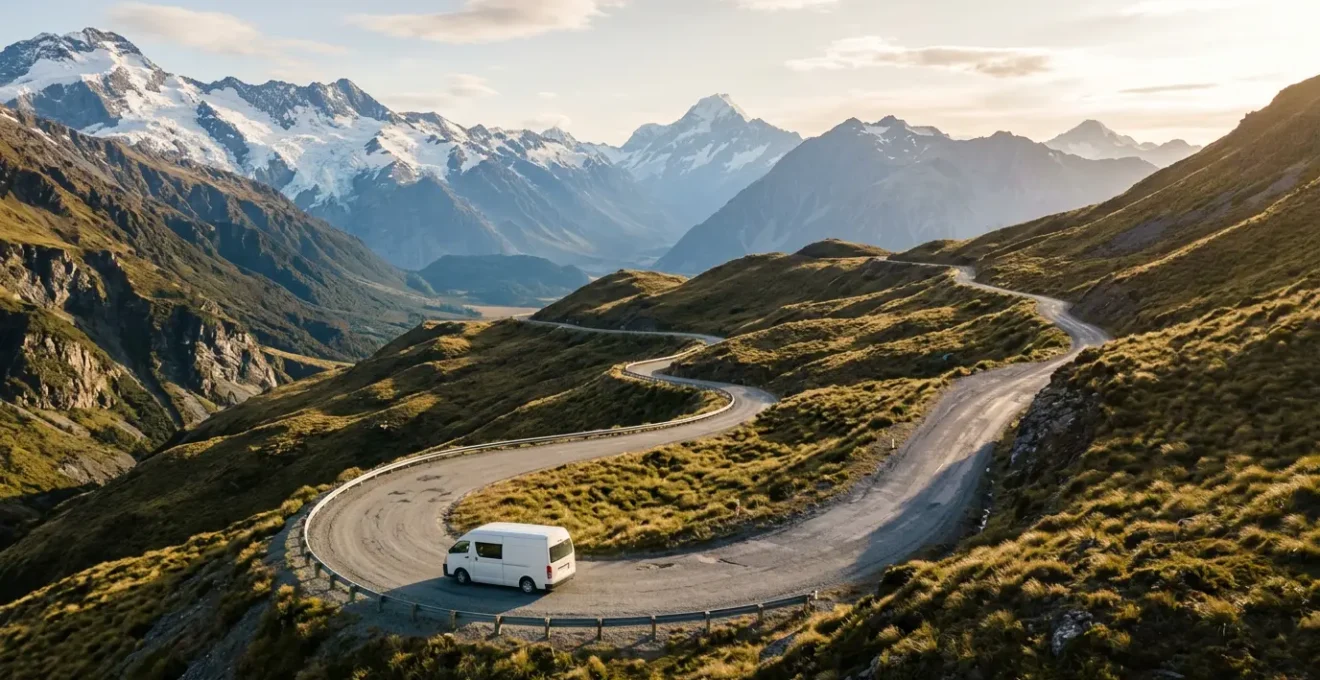
For many British tourists, the dream of a New Zealand road trip is painted in hues of emerald hills and serene lakes. You picture yourself pulling over at a scenic viewpoint, brew in hand, gazing at a landscape straight from a fantasy film. The reality, when you’re handed the keys to a 6-metre, 3.5-tonne motorhome, can be a white-knuckled, heart-pounding ordeal. Your trusty hatchback experience from the M25 or winding B-roads of Cornwall does not prepare you for this.
The common advice is plentiful: “remember to drive on the left,” “watch for one-lane bridges,” and “take your time.” While well-intentioned, this advice dangerously misses the point. It frames the challenge as one of simple road rules, when the real danger lies in the laws of physics. The critical error is treating your campervan like a car. It is not. It’s a light truck with the aerodynamics of a house brick and the momentum of a small whale.
But what if the key to survival and enjoyment wasn’t just about following the road code, but about understanding the machine you are operating? This guide is not another tourist blog. It is a debrief from a heavy vehicle instructor, designed to shift your mindset from that of a holidaymaker to that of a competent operator. We will dissect the specific, high-stakes scenarios you will face, from why your GPS is lying to you, to the precise technique required to descend a mountain pass without your brakes catching fire.
This guide provides a structured approach to mastering the unique challenges of the South Island. We will break down the essential knowledge you need, section by section, to ensure your dream trip doesn’t end in a call to your insurance provider or, worse, emergency services. Here is the critical intelligence that will keep you safe on the road.
Summary: A UK Driver’s Survival Guide to NZ Campervan Routes
- Why Google Maps Underestimates South Island Driving Times by 30%?
- How to Safely Execute Mountain Engine Braking on the Crown Range Road?
- Self-Contained Motorhomes vs Budget Vans: Which Handles the Crosswinds Better?
- The Unsealed Road Mistake That Voids Your £1,500 Campervan Excess Deposit
- In What Order Should You Tackle the Alpine Passes During Winter Months?
- Why Google Maps Fails British Drivers on Unpaved Rural Roads?
- Why the Hire Desk Always Claims Your UK Excess Policy Is Invalid?
- How to Avoid the £200 Insurance Trap When Booking Rental Cars in Europe?
Why Google Maps Underestimates South Island Driving Times by 30%?
The first mistake a UK driver makes is trusting Google Maps implicitly. Its algorithm is calibrated for a standard passenger car travelling at the maximum legal speed limit. Your campervan is neither. In New Zealand, the moment your vehicle is over 3,500kg, your speed is legally capped. As a result, motorhomes are restricted to 90km/h even when the general speed limit is 100km/h. This 10% reduction is just the beginning of the time-discrepancy problem.
The true danger of Google’s estimates lies in its failure to account for vehicle dynamics on challenging terrain. A car can safely take a hairpin bend marked “45 km/h” at close to that speed. Your top-heavy motorhome, with its high centre of gravity, may need to slow to 25 km/h to avoid an unnerving body roll or, in extreme cases, a stability issue. Every tight corner, every steep incline where your engine struggles, and every cautious descent adds minutes that Google’s algorithm simply ignores. For any mountainous route, a professional driver adds a minimum 30% buffer to any GPS estimate.
Relying solely on consumer-grade apps is a recipe for rushing, which leads to fatigue and poor decisions. A professional operator uses specialised tools for mission planning. Ditch the blind faith in a single app and adopt a multi-source approach for accurate journey planning:
- Use the Waka Kotahi (NZTA) official journey planner for real-time road closures and conditions.
- Download the CamperMate app for user-submitted actual travel times and local insights.
- Check topographical map apps like Gaia GPS to visually assess road gradients before you commit.
- Plan for mandatory rest stops and photo opportunities at scenic viewpoints, which Google never accounts for.
This isn’t just about arriving on time; it’s about managing your cognitive load and ensuring you are alert and capable for the entire drive.
How to Safely Execute Mountain Engine Braking on the Crown Range Road?
The Crown Range Road between Queenstown and Wanaka is a rite of passage, but for the unprepared campervan driver, it can be terrifying. Multiple documented cases show drivers becoming overwhelmed, with some found ‘trembling and in tears at the top of the pass, too scared to keep driving.’ The root cause is not just the steepness; it’s a fundamental misunderstanding of a heavy vehicle’s braking system.
Your car’s brakes are designed to stop a 1.5-tonne vehicle. Your motorhome’s brakes are tasked with controlling 3.5 tonnes of momentum pushing downhill. Relying on the brake pedal alone (known as “riding the brakes”) superheats the brake pads and fluid. This leads to “brake fade,” a terrifying situation where the pedal feels spongy and the vehicle stops slowing down. As a contributor on a TripAdvisor forum starkly puts it:
Riding the brakes all the way down the mountain can set the brake pads on fire. If that happens you will have no brakes. SO use the engine to hold your vehicle’s speed
– TripAdvisor Crown Range Forum Contributors, TripAdvisor New Zealand Forum – Crown Range Road Discussion
The professional technique is engine braking. This means using the engine’s resistance to control your speed, saving the brakes for short, firm applications. Before you begin the descent, shift your automatic transmission from ‘D’ (Drive) to ‘L’ (Low), ‘2’, or ‘1’. The engine RPMs will rise, but this is what you want. The engine is now acting as a brake. Your goal is to descend the entire pass without your foot constantly on the brake pedal. Use the brakes to scrub off excess speed before a corner, then release them and let the engine do the work. This practice of mechanical sympathy is non-negotiable for mountain driving.
Before beginning any major descent, select your low gear on a flat section and perform a brake test. Maintain a steady, low speed throughout the switchbacks. Do not wait until you are gathering speed to shift down; by then, it might be too late.
Self-Contained Motorhomes vs Budget Vans: Which Handles the Crosswinds Better?
The South Island is infamous for its powerful winds, especially the Nor’wester that funnels through mountain passes and across the Canterbury Plains. For a driver in a high-sided vehicle, a sudden gust is not a minor inconvenience; it’s a powerful, unseen force that can push you across the centre line or off the road entirely. Understanding how different vehicles cope with this hazard is key to your safety.
The crucial factors are weight, profile, and centre of gravity. A large, fully self-contained motorhome (like a 6-berth model) has a massive side profile—a “sail area”—that catches the wind. However, its significant weight (often 3,500-4,500kg) provides a degree of stability, helping to keep it planted on the road. In contrast, a budget high-top van is a worst-case scenario: it has a large sail area but lacks the weight to counteract the wind’s force, making it dangerously skittish in gusts.
The safety guide from Wilderness Motorhomes correctly warns that high-sided vehicles like motorhomes are significantly more prone to being pushed around on roads in powerful gusts. Your job as the operator is to anticipate this. Watch for wind socks on bridges, rustling trees, and dust being kicked up. When you feel a gust, slow down and steer gently into it to maintain your lane position.
This comparative table breaks down the stability characteristics. The heavier motorhome, despite its height, often performs better than a lighter, tall van due to its sheer mass providing crucial inertia against wind forces.
| Vehicle Type | Weight (kg) | Height (m) | Wind Stability | Center of Gravity |
|---|---|---|---|---|
| Self-Contained Motorhome (6m) | 3500-4500 | 3.2-3.5 | Better – heavier weight provides stability | Higher but compensated by weight |
| Budget High-Top Van | 2200-2800 | 2.8-3.2 | Poor – acts like a sail | High with insufficient weight |
| Compact Campervan | 2000-2500 | 2.2-2.5 | Moderate – lower profile helps | Lower and more stable |
The Unsealed Road Mistake That Voids Your £1,500 Campervan Excess Deposit
Here is the most important sentence in your rental contract, and the one most tourists ignore: your insurance is almost certainly void the second your wheels touch an unsealed (gravel) road. This is not a vague guideline; it is a strict, legally binding exclusion. As the official terms for major rental companies like Britz state, their vehicles are for use on specific surfaces only.
All RVs can only be driven on sealed/bitumen roads
– Britz Campervans New Zealand, Official Rental Terms and Conditions
The “why” is simple: the risk of damage skyrockets. Gravel roads kick up stones that can chip windscreens, crack headlights, and puncture the vulnerable undercarriage components like fluid tanks and exhaust systems. The cost of these repairs will not be covered. You will be liable for the full amount, and it will be taken directly from your excess deposit, often £1,500 or more.
The ultimate example is Skippers Canyon Road near Queenstown. It is a road so treacherous that rental car insurance is explicitly not honoured. In the age of telematics, arguing is futile. Rental companies use GPS tracking to verify if a vehicle has been on a prohibited road. If the data shows you were there, your contract is breached, and your entire deposit is forfeit. There is no appeal.
Do not be tempted by a “shortcut” that Google Maps suggests down a charming rural lane. If the smooth, black tarmac turns to loose grey stones, you are in a contractually prohibited area. The risk is not a potential puncture; the risk is a guaranteed £1,500+ bill. Your only move is to find a safe place to stop, turn around, and return to the sealed road.
In What Order Should You Tackle the Alpine Passes During Winter Months?
Attempting a South Island road trip during the winter months (June to August) requires an entirely different level of planning and respect for the conditions. It is not “New Zealand with snow”; it is a high-alpine environment where roads can close in minutes and conditions can become life-threatening. According to Campervan New Zealand’s winter safety guide, the South Island frequently sees sub-zero temperatures and significant snowfall in alpine regions, making road conditions unpredictable.
A professional operator doesn’t just “go for it.” They have a strategic plan that mitigates risk by considering elevation, sun exposure, and maintenance priority. Tackling the passes in the wrong order or at the wrong time of day dramatically increases your risk of getting stuck or encountering black ice. Your route should not be based on which scenery you want to see first, but on a risk-based topographical analysis.
The following is not a suggestion; it is a professional, strategic order of operations for navigating the main South Island passes in winter. Adhering to this logic significantly improves your margin of safety:
- Start with Lewis Pass as your warm-up: It has a lower elevation and is generally better maintained, making it a good first test of your skills.
- Tackle Arthur’s Pass in the late morning: This allows the sun to have time to warm the north-facing slopes and melt any overnight ice.
- Plan Haast Pass for early afternoon: This ensures you are crossing when maximum solar warming has occurred, giving you the best possible road surface.
- Keep the Crown Range for clear weather days only: As the highest and most challenging sealed road, it should only be attempted in perfect conditions.
- Always have an escape route planned: For example, if Lewis Pass is closed, know that the West Coast route is your alternative.
- Check the Waka Kotahi website on the morning of travel: This is for real-time closure updates; yesterday’s forecast is irrelevant.
- Carry snow chains and know how to fit them: Even if the road is clear when you start, conditions can change within hours. It is a legal requirement on many passes.
Winter driving is a serious undertaking. If you are not prepared to follow a strict safety protocol, you should reconsider your travel dates.
Why Google Maps Fails British Drivers on Unpaved Rural Roads?
For a British driver, the term “road” comes with a set of unspoken cultural expectations. Even the most minor, single-track B-road in the UK is almost invariably a sealed, tarmac surface. This fundamental assumption is dangerously false in New Zealand and is a primary reason why digital maps can lead you astray. Many routes that appear as standard, viable roads in Google Maps are, in fact, unsealed gravel tracks entirely unsuitable for a rental campervan.
The shock for UK drivers is a common narrative. They follow their GPS down what looks like a normal road, only for it to suddenly transition from tarmac to loose gravel without warning. In the backcountry, where mobile signal is unreliable, you can find yourself miles down a prohibited road before you can even check an alternative route. This isn’t just about a bumpy ride; as we’ve established, this is a direct violation of your rental agreement with severe financial penalties.
So, how can you, a driver unfamiliar with the territory, identify these traps before you drive into them? You must learn to “read” the map with a cynical, professional eye. Don’t just look at the line; look for clues. Use Google’s Satellite view to physically inspect the road surface. A lack of defined white lines, dusty edges, and a generally “soft” appearance are all red flags for a gravel road. Furthermore, road names containing words like ‘Station’, ‘Valley’, or ‘Back’ often indicate rural, unpaved routes. There is no direct equivalent to a UK B-road; what appears to be one on a map could be anything from a major highway to a gravel track. Your default assumption for any non-primary highway should be one of suspicion until proven otherwise.
This failure of digital mapping is a critical blind spot. You must augment its guidance with common sense and active investigation. If a route looks too good to be true, or if it deviates from the main numbered highways, it requires manual verification before you commit your vehicle.
Why the Hire Desk Always Claims Your UK Excess Policy Is Invalid?
It’s one of the most stressful moments of any car rental: you’ve confidently purchased a third-party “excess waiver” policy in the UK, only for the hire desk staff in New Zealand to tell you it’s “not valid” and pressure you into buying their expensive daily insurance. This is not a scam; it’s a fundamental conflict between two different insurance models. Understanding this is crucial to navigating the encounter without stress or unnecessary expense.
Your UK policy operates on a reimbursement model. This means that if damage occurs, you are contractually obligated to pay the rental company the full excess amount (e.g., £1,500) on your credit card. You then take the paperwork and claim that money back from your UK insurer. The rental company’s policy, however, is a direct billing model (often called a Collision Damage Waiver or CDW). With their policy, you pay nothing upfront, and if damage occurs, you pay only a small, pre-agreed deductible.
The hire desk staff are correct when they say your policy is “invalid” *for them*. They have no contract with your UK provider and will not deal with them. Their only contract is with you. Therefore, to protect themselves, they must place a pre-authorisation hold on your credit card for the full excess amount. The conflict arises because they are incentivised to sell their own high-margin product.
Knowing this, you can take control. You are not there to argue. You are there to execute a financial transaction. The following table clarifies the difference, and the script below gives you the exact words to use.
| Insurance Type | How It Works | At Rental Desk | If Damage Occurs |
|---|---|---|---|
| Rental Company’s CDW | Direct agreement with rental company | No credit card hold for excess | Pay only deductible directly |
| UK Third-Party Excess Cover | Reimbursement model | Full excess hold on credit card (£1500+) | You pay rental company first, claim back from UK insurer |
When faced with pressure at the desk, remain calm and polite, and use this script recommended by travel insurance advisors:
I understand you are not a party to my insurance agreement. I will pay the full excess on my credit card as per our rental contract and seek reimbursement from my provider. Please ensure all damage reports and invoices are itemised for my claim.
– Expert Travel Insurance Advisor, Recommended Script for Rental Counter Negotiations
Key takeaways
- Your campervan is a truck, not a car. It operates under different laws of physics and requires professional-level planning and handling.
- Your UK excess insurance is a reimbursement policy. You WILL pay for any damages first on your credit card; be prepared for this transaction.
- Driving on unsealed roads is an absolute contract violation. GPS tracking makes pleading ignorance impossible and instantly voids your entire deposit.
How to Avoid the £200 Insurance Trap When Booking Rental Cars in Europe?
While this issue is often framed around European rentals, the underlying principle of the “insurance trap” is a global problem for tourists, and it’s particularly acute in New Zealand’s high-cost rental market. The trap is sprung when you decline the rental company’s expensive in-house insurance, opting for your own policy. In response, the rental company will place a significant pre-authorisation hold on your credit card. As rental experts note, rental companies typically place a £1,500+ pre-authorisation hold, which can instantly max out a card with a low limit, leaving you with no available credit for your holiday.
At this point, you feel trapped. You are forced to either abandon the rental or purchase their expensive insurance (the “£200 trap”) just to get the hold removed. This is not an accident; it is part of the business model. Avoiding this trap has nothing to-do with arguing at the counter; it has everything to do with pre-travel preparation. You must arrive at the rental desk with a hand so strong they have no moves left to play.
Your power comes from being over-prepared. You need a high-limit credit card that can easily absorb the excess hold. You need your third-party policy documents printed and accessible. You need to have researched the specific company’s policies before you even booked. By preparing meticulously, you remove all of their leverage. The rental process becomes a simple key handover, not a high-pressure negotiation.
Your Pre-Travel Insurance & Vehicle Checklist
- Secure a high-limit credit card (minimum £3,000 available credit) before travel.
- Purchase a standalone annual excess insurance policy that explicitly covers tyres, glass, and the undercarriage of a campervan.
- Print a physical copy of your third-party insurance policy certificate to show at the desk.
- Screenshot the policy’s 24/7 emergency contact number for immediate verification if challenged.
- Research the specific rental company’s maximum excess amount before booking to ensure your credit limit is sufficient.
This preparation is the final piece of the professional driver’s mindset. You anticipate problems and implement systems to neutralise them before they occur.
Your South Island adventure can be the trip of a lifetime or a catalogue of costly errors. The difference lies in your mindset. Do not be just another tourist. Arrive prepared, operate your vehicle with the respect it demands, and understand the contractual and physical realities of your journey. Start your planning today not as a sightseer, but as the qualified and competent operator of a heavy vehicle.